How to Build a Srapbook Page
Pick your photos
First, select your photos based on one theme or event—a child’s first
birthday, your weekend trip to the coast or an everyday event like the
kids’ bath time. Think of each page as having a story to tell.
Many layouts are created in a double-page spread—meaning, when you
open your album, the page on the right and the page on the left will
match in color and theme. Consider this when you pick out your photos.
You might choose to have one very special photo on a page, or you might
want to fit 3 or 4 photos per page. Do keep in mind that while it may
feel like progress to fit a lot of photos on one page, pages often look
better when they’re not quite as crowded.
What if your photos won’t work on a double-page spread? You can
create single pages rather than a double-page spread—so don’t feel you
must always do one or the other. Work with what you have, rather than
how you think your album should be laid out. Remember, there’s no right
and no wrong!
Whether you place one really special photo on a page or 3-6 photos,
there should be a common theme connecting them. Once you’ve chosen a
theme, decide which pictures look best together. Don’t be afraid to
edit—just because you took two rolls of film at Christmas doesn’t mean
you need to use all of those photos.
Pick your papers
Once you select your photos, pick a patterned paper for your background,
this instantly adds color and depth to a page. A patterned paper is a
great way to mirror your photo’s story—and you can find a paper for
practically every look, style and theme.
Let the paper pattern help you tell your story and make creating your
album faster and easier: Choose a pattern that enhances your theme,
like an elegant paper for a page of black-and-white photos, or a fun
print for kids’ pictures. Then pick a coordinating plain paper or
cardstock to mat or “frame” the photos.
Note: You might make your double-page spread using two background
papers that match—or you may choose two papers that coordinate instead.
The choice is up to you, but they don’t have to be the same. It may be
that their only similarity is color.
Mat your photos
When using a patterned paper as a background to your photos, remember
the Golden Rule of Patterned Paper: Always mat your photo onto a solid
paper so the colors and shapes in the photo don’t compete with the
colors and shapes on the background paper.
To mat a photo, just glue it onto your solid matting paper 1/8”-1/2”
away from 2 sides, so you have a border around the picture. Then cut the
other 2 sides so you have a frame around your photos. A mat provides a
visual “space” between the photo and the paper. Even if your background
paper is a solid color, still mat it so it has a more finished look.
Think of it as framing a picture before you hang it on the wall—whether
you have wallpaper or not, a frame still adds a nice polished touch.
How do you select the color of your mat? Take into consideration the
primary (dominant) color and the secondary colors in the background
paper, then mat photos with a solid paper in the secondary color. For
example, if the paper is mostly pink with some white, mat your photos
with white. If the pattern is especially large or brightly colored, give
your photo a wider (maybe 1/2”) mat. When in doubt, remember that black
and white (or off-white) are classics and can be used with nearly
everything.
Lay out your page
Arrange your elements (photos, journaling, embellishments) on the
background paper. Before you glue them down, move them around to make
sure you like the placement.
There are dozens of layout ideas you can use for inspiration, but the
following are a few good rules of thumb. The center of your album page
attracts the eye; if it’s empty, the page will look incomplete.
Overlapping elements, like photos or embellishments, connects them
visually and makes for a nice arrangement. Also, use uneven numbers of
photos and embellishments when laying out your page, this is technique
used by many artists.
Many scrapbookers will “scraplift” a layout design. This means you
take a layout design and “lift” the design to use on your own page,
incorporating your own photos and papers while using the layout design.
The theme of a layout doesn’t really matter because you can turn a
Halloween layout into a Christmas page by simply changing papers and, of
course, adding your photos.
Journal your story
You can write directly on the page, but sometimes it’s easier (and less
stressful) to journal onto a separate scrap of paper, then mat this
piece and glue it to the page. If you make an error, you can just flip
the paper over and start again. You can also journal on your computer
and print it out. This is great for those of us who don’t like our
handwriting or need to use spell-check!
When you’re finished with your scrapbook page, simply place it in your sheet protector then into your album.
Three-ring binders
are great because they make it easy to add pages as you go back in
time. It means you don’t have to take apart the entire album to add
pages or rearrange them. Post-bound albums come with white paper inside
the sheet protectors. You can decorate the white page or take it out and
replace it with a page created with patterned papers.
So, background paper, solid paper for matting, a little (or a lot of) journaling and that’s it—you’ve completed your first page!
Voila...let's see my class...
School holiday scrapbook class:
Welcome to My Home
by Dias
I Love My Family
by Alen
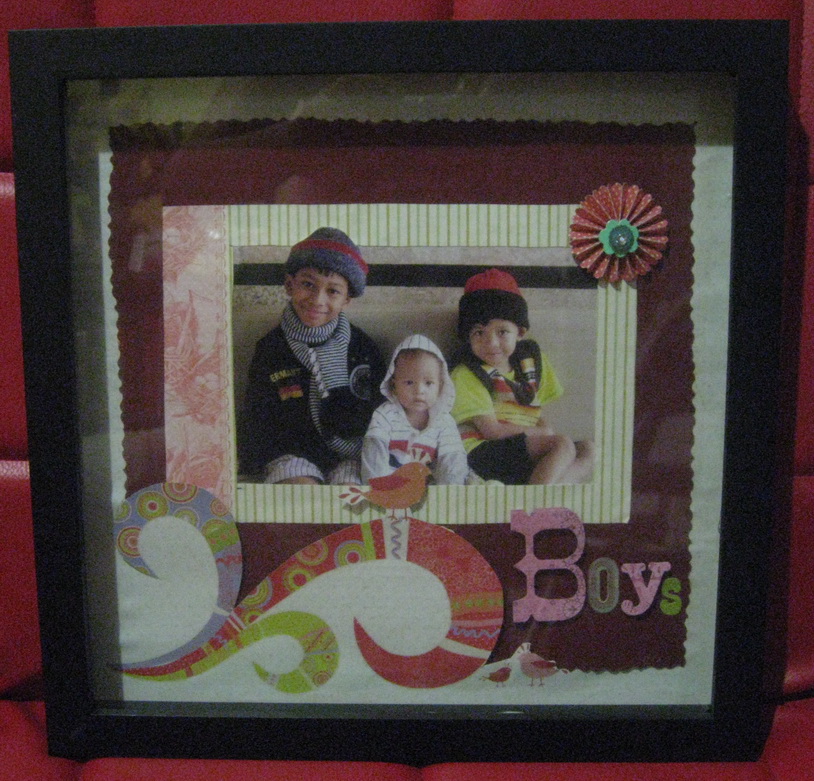
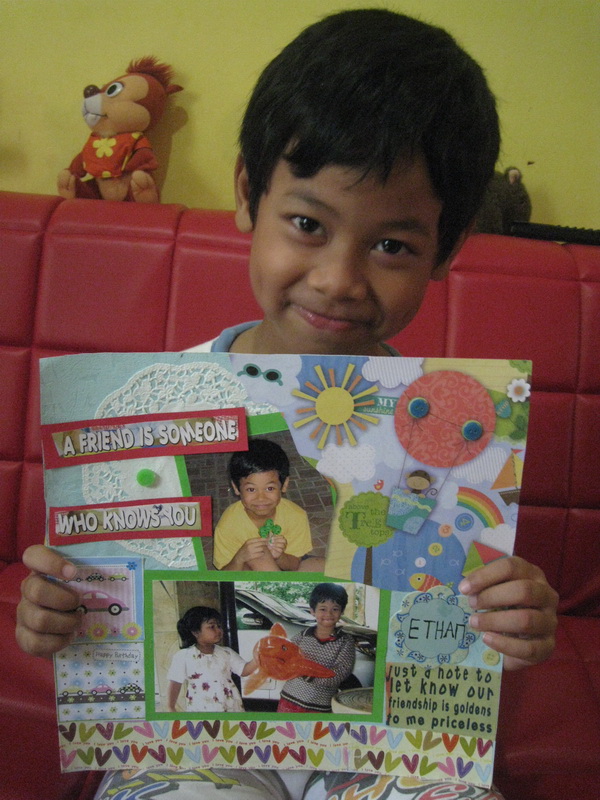
A Friend is someone Who Knows You
by Ethan
Pretty
by Abel